
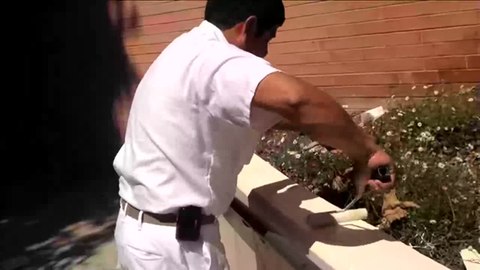
A demonstration of wall painting
For professional painting, the majority of the time is spent in preparation for paint application, not in painting per se. Cleaning and sanding surfaces, scraping loose and failing paint, taping and applying paper or plastic to surfaces not to be painted typically involve 50% or more of the painter’s total time budget.
Although the brush and the fabric roller were the tools most readily associated with the painter, foam brushes are now commonly used for precise work requiring a straight line. Foam brushes can also be used to create a smoother surface using less paint that dries more quickly than brush applications.[4] Like fabric rollers, foam rollers can also create patterns in the painted surface. Foam rollers are available in a variety of professional materials for high-quality applications.[5]Although used in a variety of applications, the foam roller is commonly used during the painting of doors to produce an extremely smooth finish.
Advances in manufacture have led to a standardization of brushes, with many older types of brushes falling from fashion.[2] The spray gun is one of the latest tools in the painter’s arsenal. It is powered by an electric, pneumatic or fuel-powered motor which pumps paint through a hose into a gun which atomizes the paint to a fine spray. With the airless spray gun, it is possible to paint extremely large areas of surface in a short time.
However, sprayed paint when dry can display unsightly patterns if the spraying application does not result in an even distribution of paint. There is also the problem of overspray. Overspray is when the surrounding surfaces are sprayed with a haze of paint because they were not masked properly.
The ground brush, also known as a pound brush, was a round or elliptical brush bound by wire, cord or metal. They were generally heavy to use, and required considerable usage to break them in. These brushes were predominantly used in the days before modern paint manufacturing techniques; hand-mixed paints requiring more working to create the finish. These brushes still have use in applying primer, as they are useful in working the primer into the grain of the wood. Pound brushes required an even breaking in to create even bevel on both sides of the brush, minimising the formation of a point which would render the brush useless.[2] Sash tools were smaller brushes, similar to a ground brush, and used mainly for cutting in sash or glazing bars found on windows.
Sash tools and ground brushes generally required bridling before use, and a painter’s efficiency in this skill was generally used as a guide to their overall ability. Both these brushes have largely been superseded by the modern varnish brush. Varnish brushes are the most common flat brushes available today and are used for painting as well as varnishing. Brushes intended for varnishing typically have a bevelled edge.[2]
Distemper brushes, used for applying distemper, an early form of whitewash, were best made of pure bristle and bound by copper bands to prevent rust damage. Styles differed across the world, with flat nailed brushes popular in Northern England, a two-knot brush (a brush with two ovular heads) popular in Southern England, and three-knot brushes or flat-head brushes preferred elsewhere. In the United States, distemper brushes were known as calcimine, kalsomine or calsomine brushes, each term being the U.S. variant of whitewash.[2]
Fitches are smaller brushes, either ovular or flat and one inch wide, that are used in fine work such as to pick out the detail on a painted moulding. Stipplers come in various shapes and sizes and are used to apply paint with a stippled effect. A duster or jamb brush was used to dust the area to be painted before work commenced. Stencil brushes, similar in style to a shaving brush, were used for the purpose of stencilling walls or in the creation of hand-made wallpapers.[2]
Brushes are best stored in a purpose-made brush keeper, a box on which a wire could be suspended. The wire would be threaded through the hole in a brush’s handle so as to suspend the brush in a cleaning solution without allowing the brush to sit on the bottom of the container and thus cause spreading of the bristles. The solution would also prevent hardening of the brushes and oxidization. These were generally rectangular and stored several brushes. A lid would enclose the brushes and keep them free from dust.[2]
If brushes are cleaned after use, they can last for years. Since most modern exterior and interior paints are latex-based, cleaning the painting brushes after use with hot soapy water and a toothbrush can remove all traces of paint. Oil-based paints are normally cleaned with a natural or synthetic solvent such as mineral spirits, again using a toothbrush to remove all traces of paint. Metal “combs” are used to penetrate into the bristles of a brush to remove drying paint.
Although paints are now available in no-drip containers to pour paint into trays for roller application, most paints are sold in metal gallon or quart cans. For large jobs, paints come in 5-gallon containers.
For metal cans, a large diameter nail or punch is used to make drain holes in the lip of the can. The holes allow paint to return into the can. The lid can then be reattached correctly and removed later. Without the drain holes, paint will accumulate in the lip, and act as an adhesive, preventing the lid from being easily removed later. Closing a lid with paint in the lip can also result in paint travelling 15-feet or more horizontally.
The air in partly filled paint cans forms over time a dried surface film. To prevent development of film, prior to closing a latex paint container add a small amount of distilled (or tap) water that will remain on the top and prevent drying. For oil-based paints, use the solvent recommended for brush cleaning. When the container is reopened, stir the water/solvent into the paint before using.
Drop cloths for painting, brown painter’s paper, dust-sheets, paint sheets, paint tarpaulins or plastic protection films are used to protect nearby surfaces that are not being painted.
Masking tape for painting can be used to define the line between the painted and unpainted surface, as well as to hold protection materials in place. Masking tape is available in several categories. The classic tape is a high adhesive. However, it can damage the underlying surface when removed, and the longer it is in place, the greater the risk of damage.
Modern delay removal tape for painting prevents damaging the taped surface. “Delicate” tape has about 40% the adhesion of traditional tape, and can remain on a surface for up to 30-days without creating damage.[6]
The less adhesive tapes should be used especially when tape is applied to new work. Depending on the paint composition, “dry” paint may still be soft and easily damaged for 30 days or more.